
EP Workbench

Getting Started:
Download the EP Workbench
Cross-platform electrophysiology data analysis.
Click the button below to download the software for free and start your experience with our innovative tools designed for data analysis.
Download a Test OpenEP Case
Download one of the sample OpenEP cases from here
Loading a System/Case
Open EP Workbench.
In the System tab on the right, click File → Load and select the OpenEP system file.
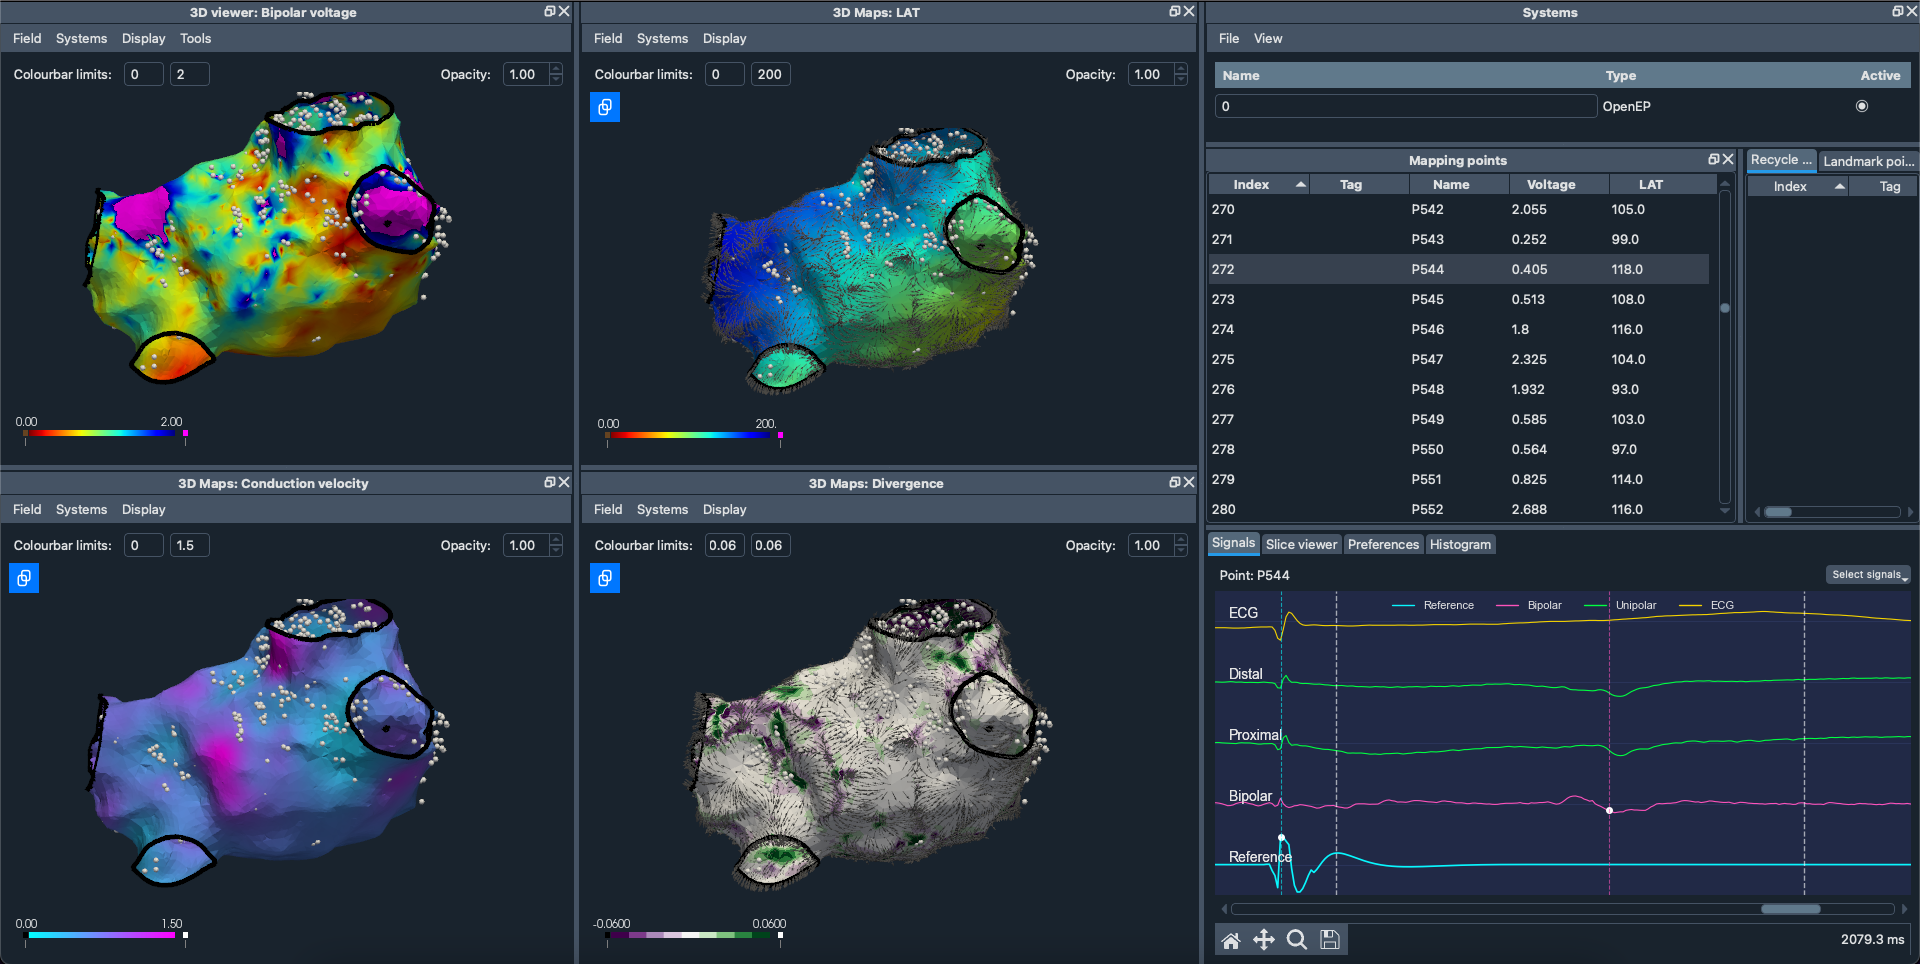
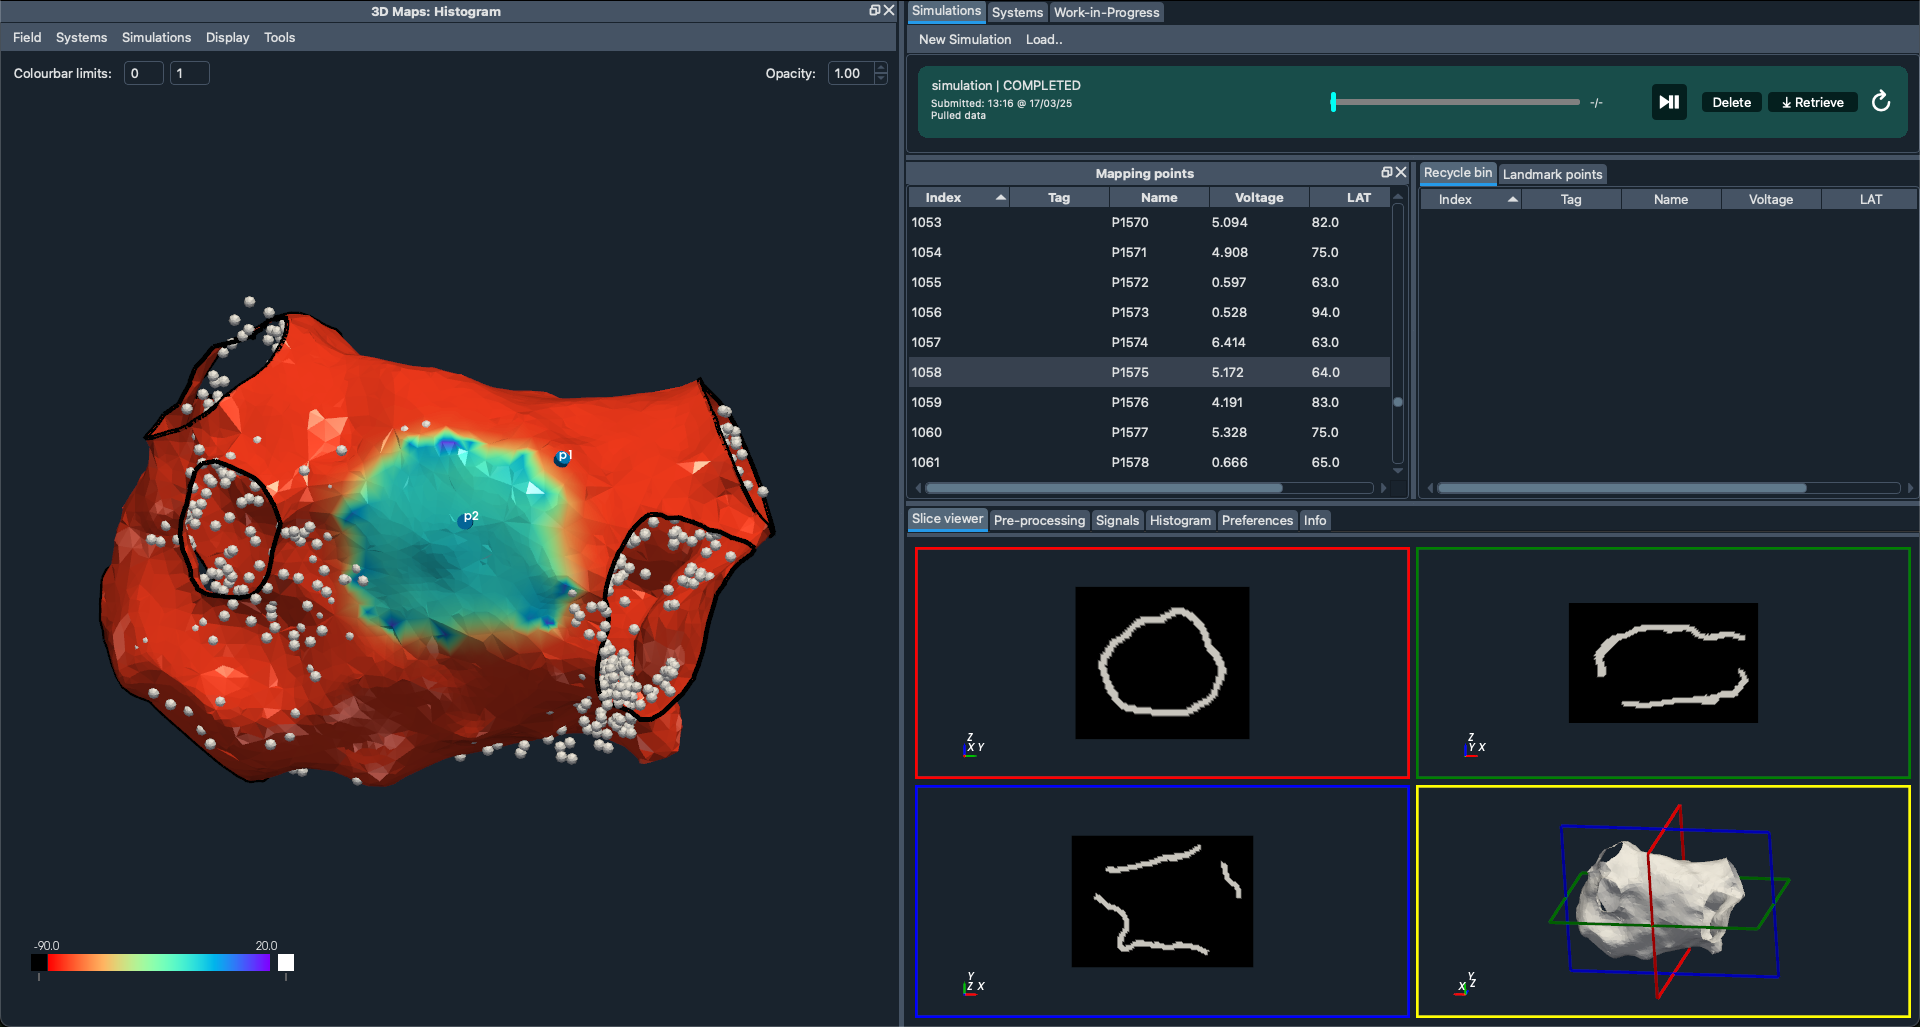
3D Viewer
The 3D Viewer window is the large docked window located on the left. The menu ribbon has the following options:
Fields Menu: Choose which field (e.g., voltage, LAT, etc.) to visualize on your 3D mesh.
Systems Menu: Toggle visibility of different loaded systems.
Display Menu: Control display elements such as mapping points, landmarks, surface projections, and divergence arrows.
Tools Menu: Access mesh editing, landmark picking, region selection, mesh registration, and dataset combination.
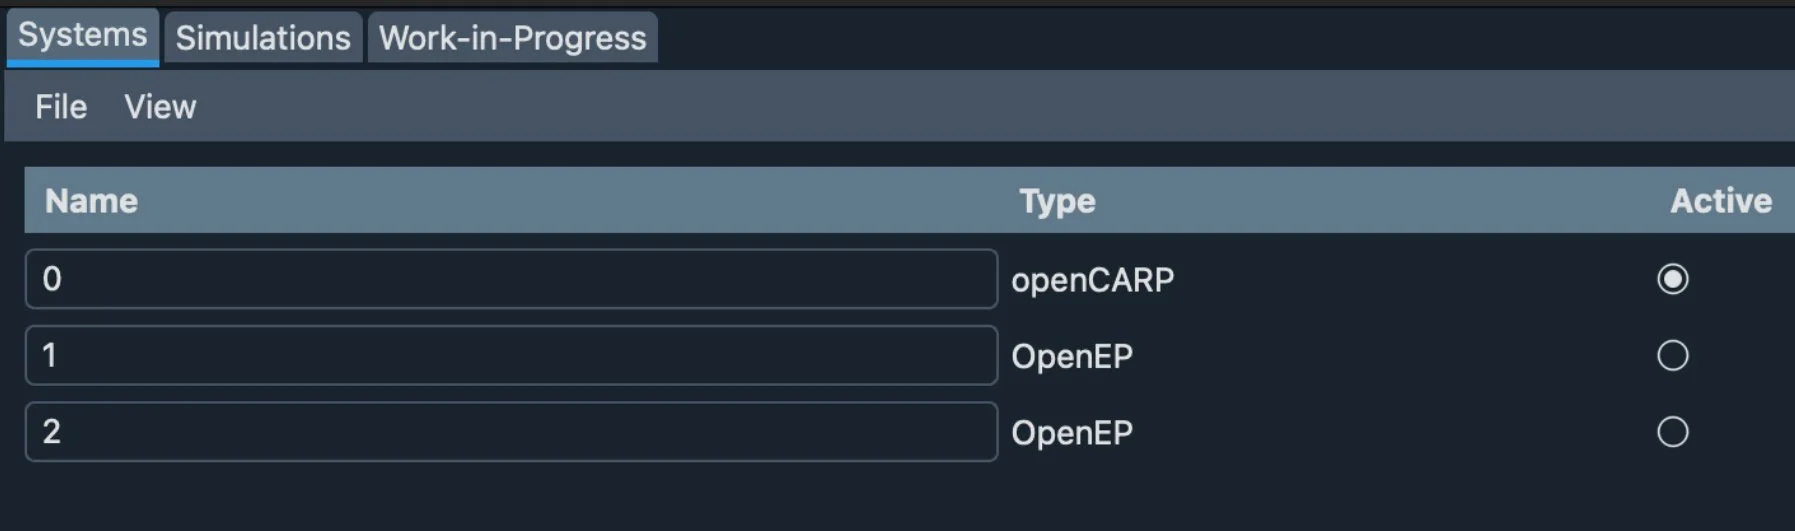
Systems
A system represents a single data object, this could be a model of the left atria or a biatrial model or even a rectangular slab.
The Systems window (on the right) lists all loaded systems.
Display multiple systems at once, and create multiple views of each system.
Select the Active system to make changes to that specific system.
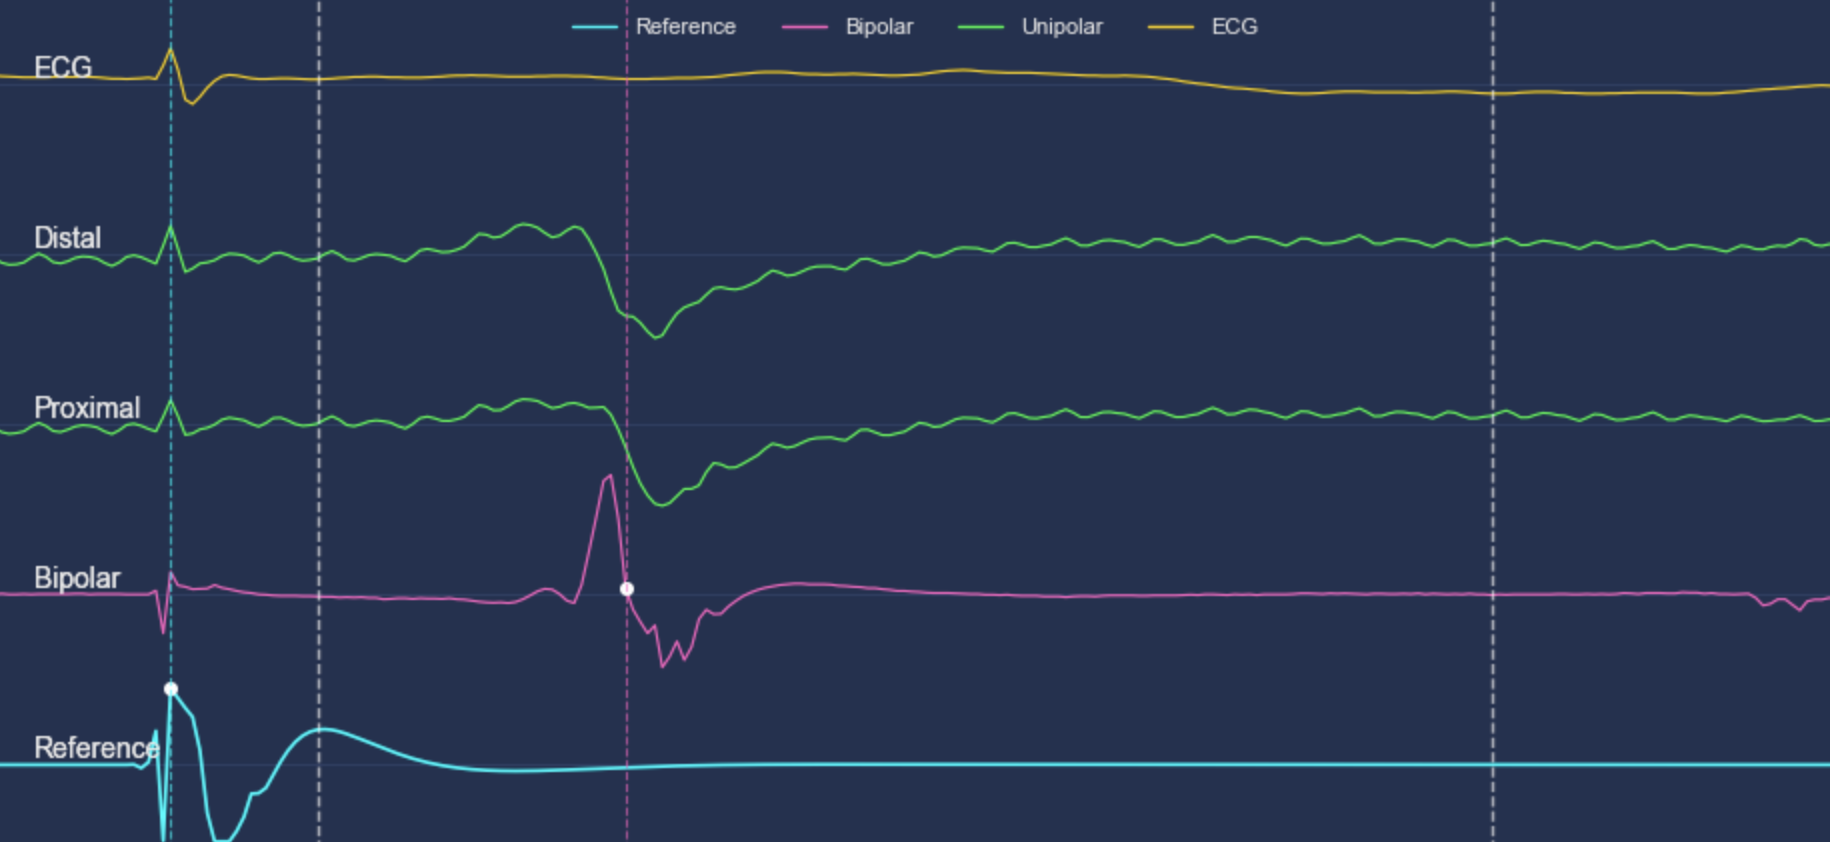
Signals
The Signals tab shows ECG signals that can be annotated within the software.
How to Annotate ECG Maps: View the guide
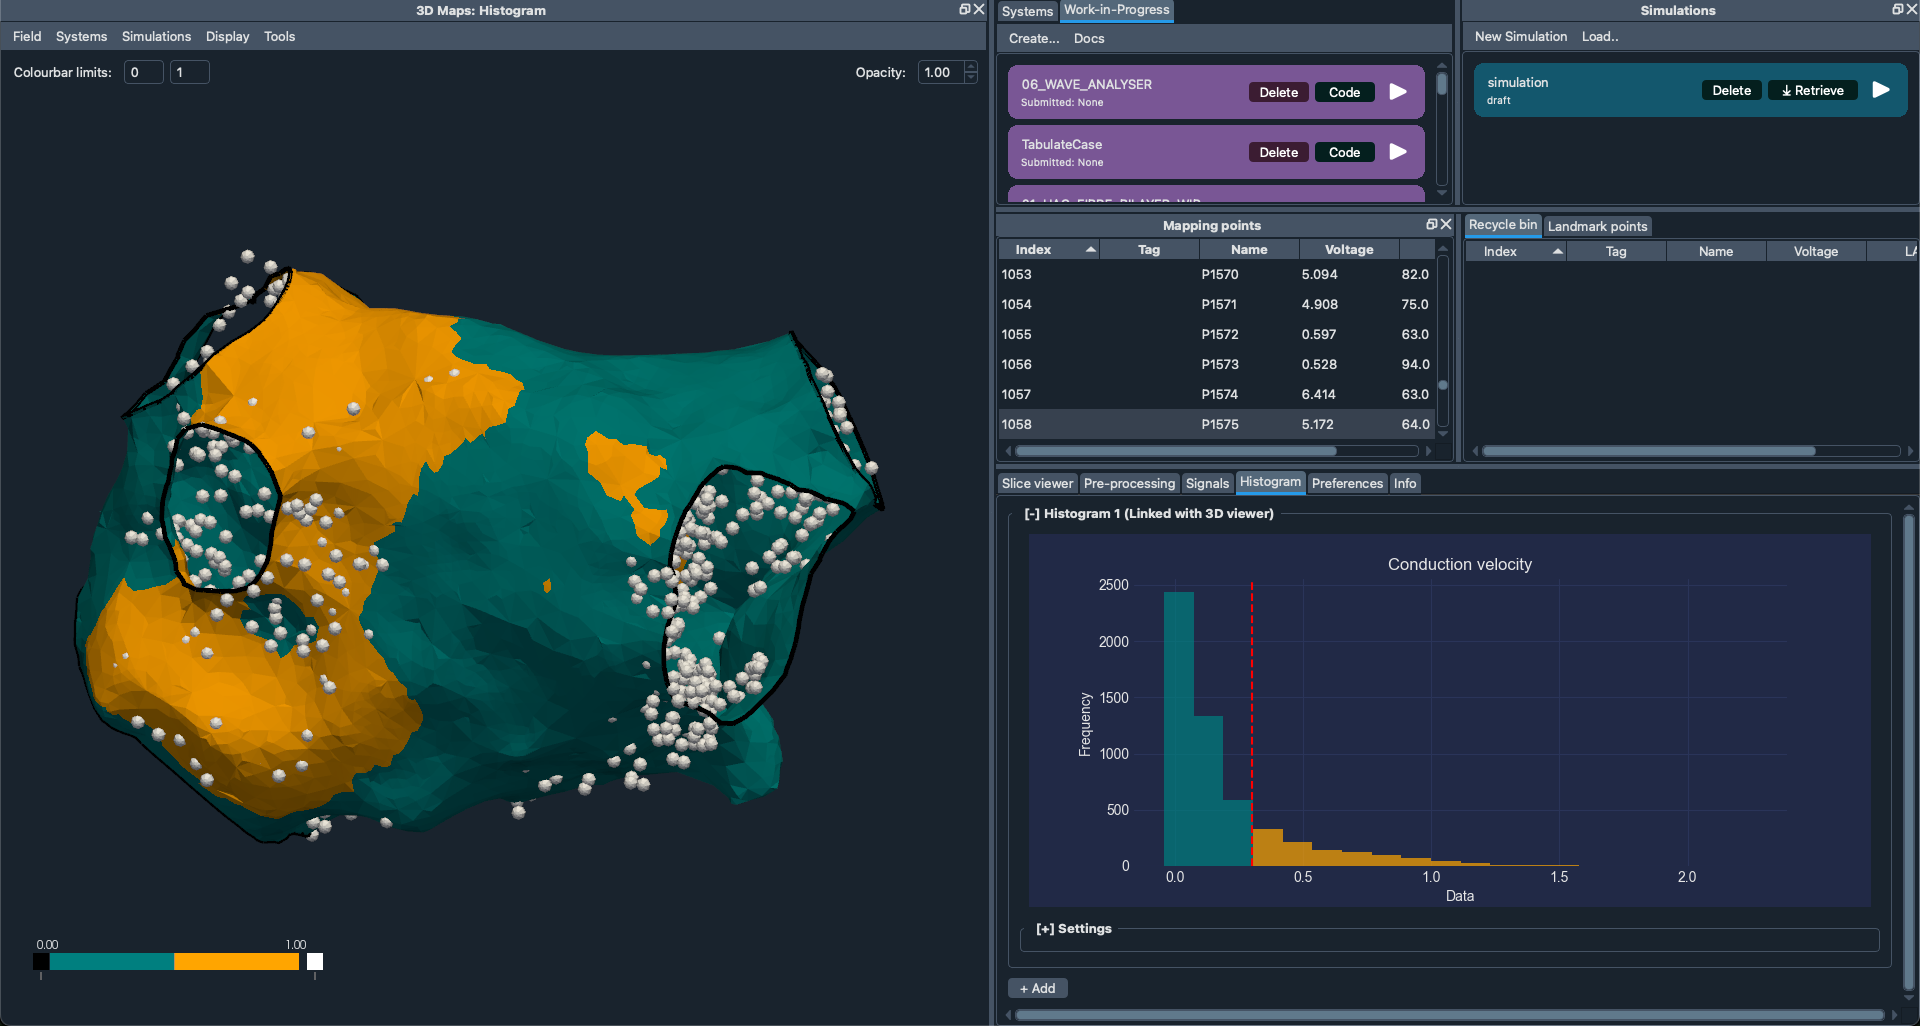
Histogram Analysis
Histogram Analysis provides a quantitative view of voltage maps beyond simply measuring low-voltage areas. It is an extension of voltage area calculations, allowing multiple voltage ranges of interest. EP Workbench extends this further to analyse any Field including voltage.
Applying a Histogram
Open the Histogram tab (bottom right) > Settings.
Choose the Field you want to threshold.
Select the Threshold value.
Observe the two-color mapping applied to your mesh by selecting Histogram on 3D Viewer.
Find a comprehensive guide here: https://openep.discourse.group/t/how-to-use-ep-workbench-for-histogram-analysis-of-openep-data/127
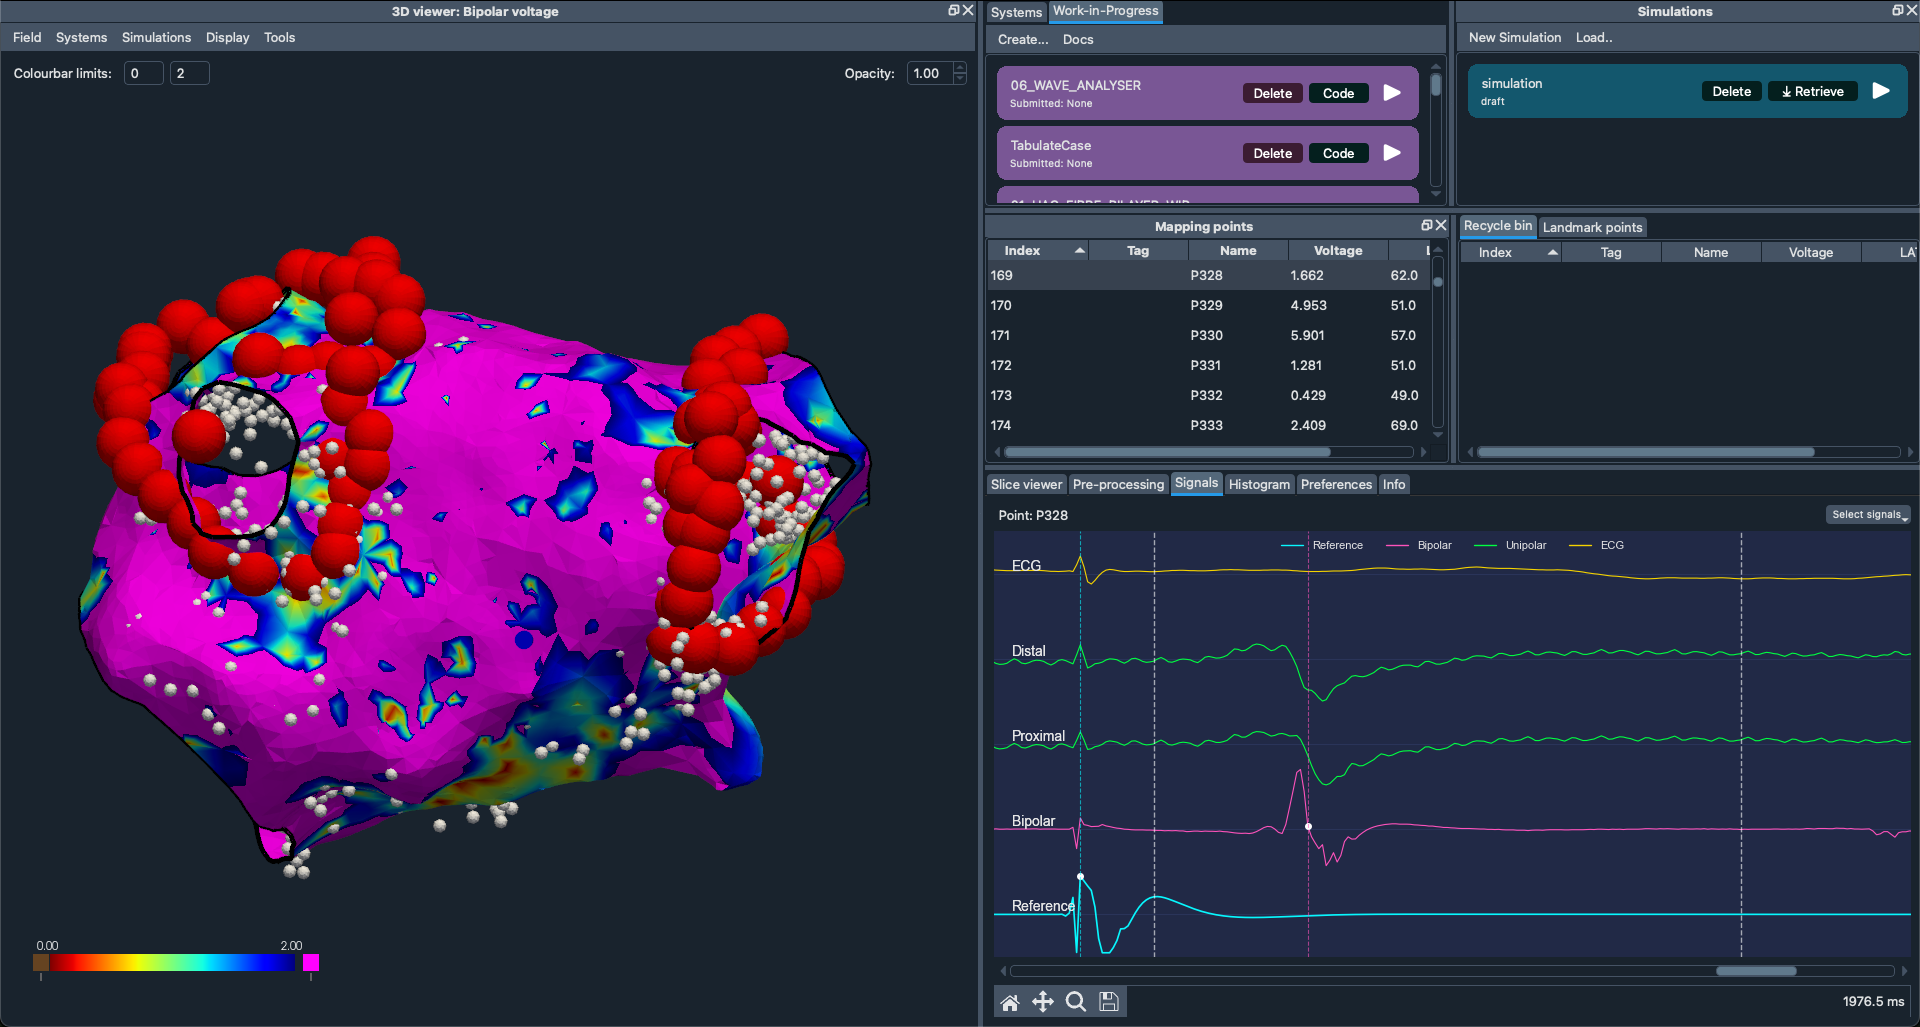
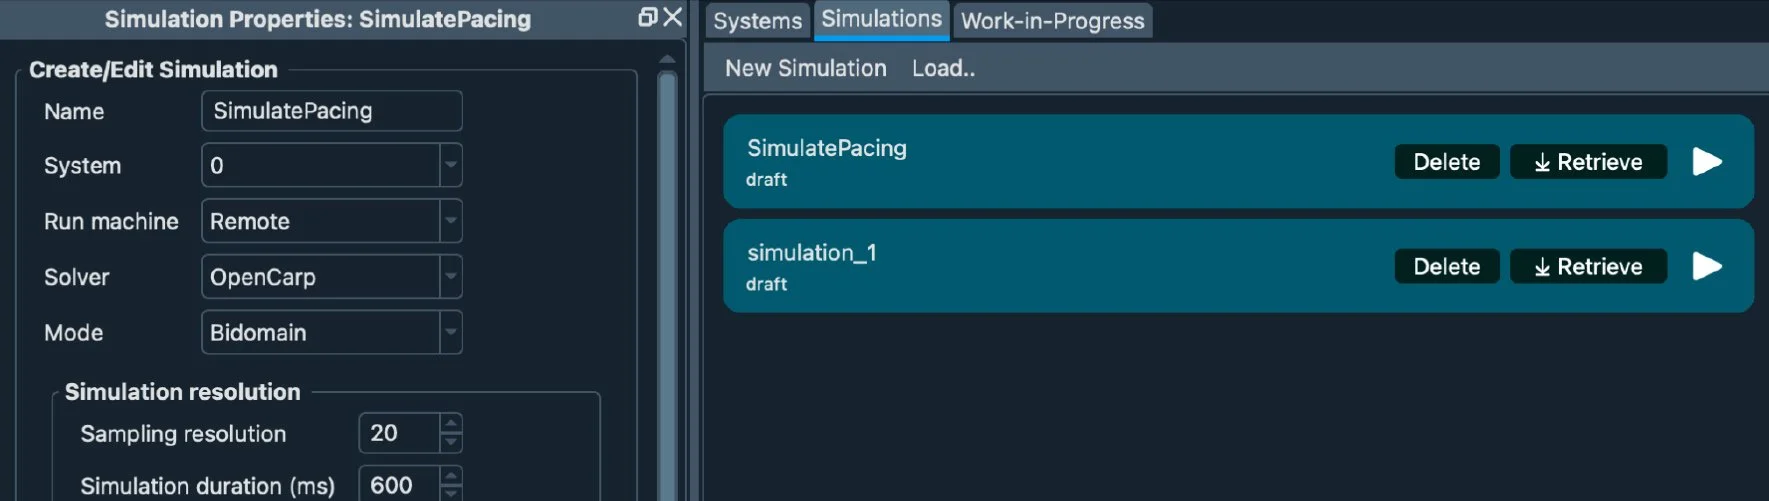
Simulations
The Simulations tab (to the right of Systems) allows you to create and run simulations locally or remotely.
Note: More resources coming soon!
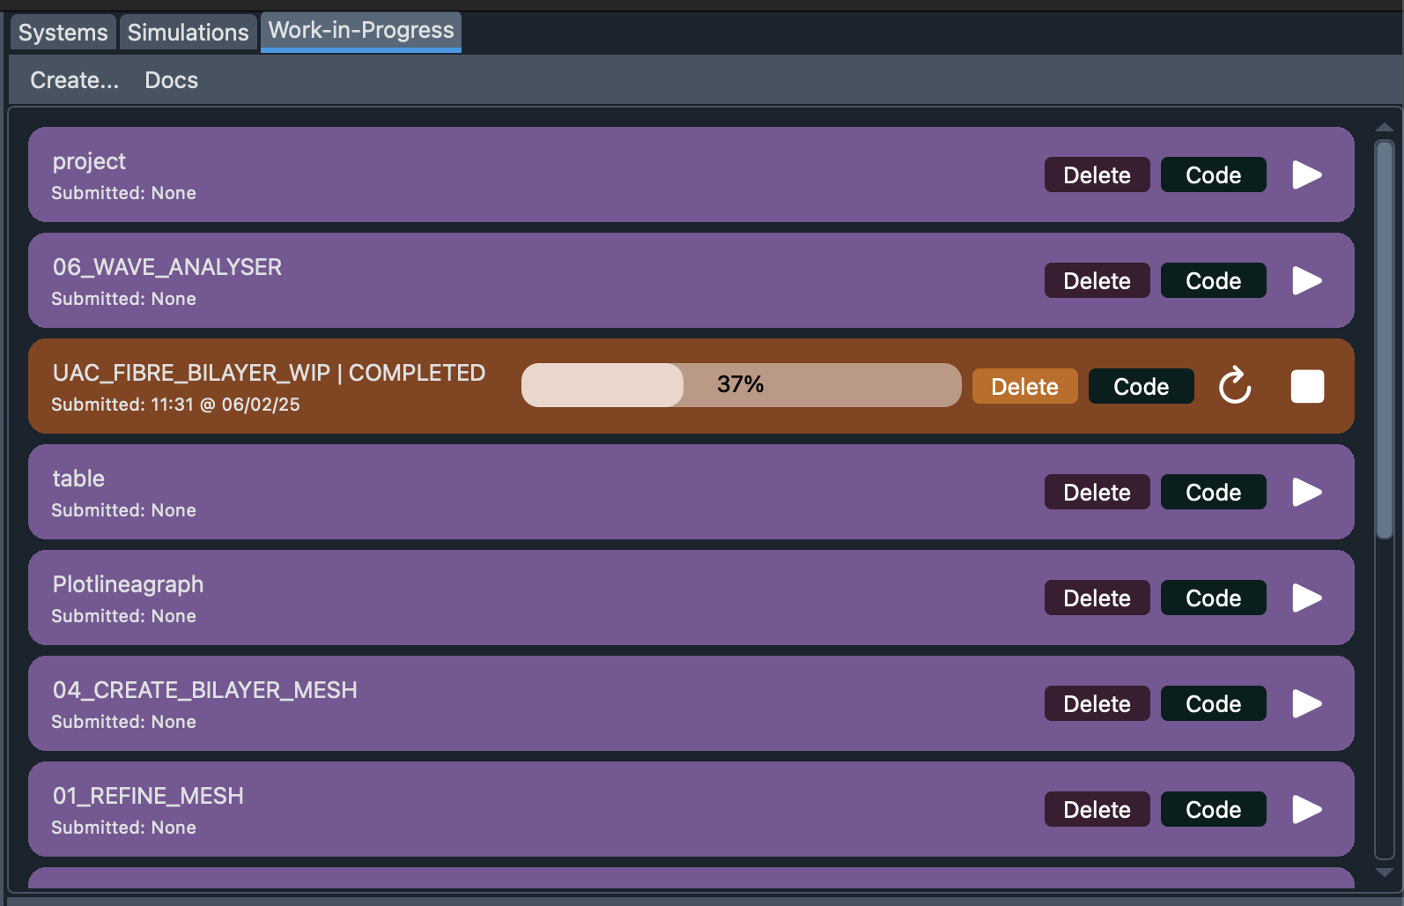
Work-in-Progress
The Work-in-Progress tab lets you integrate your own code snippets to run on EP Workbench’s case objects.
You can manipulate 3D mesh data, field data, and simulation data, then display results directly in EP Workbench.

Creating a Work-In-Progress (WIP) Tool:
This guide describes the steps required to create and run a custom Work-In-Progress (WIP) tool within EP Workbench.
The Work-In-Progress tool allows your code to be integrated with the EP Workbench interface.
Launch EP Workbench, and navigate to the right-side panel and select the Work-in-Progress tab.
Create a new WIP tool.
Click on Create..., then press the Code button on the newly created project.
Complete the WIP Code Editor fields.
| Field | Instructions |
|---|---|
| WIP Name | Provide a descriptive name for your WIP tool. |
| Interpreter | Select the appropriate Conda environment interpreter, located at: conda/envs/ |
| Root Directory | Specify the path to your project root directory. (Optional if the WIP is a single script.) |
| Widget Creator Code | JSON-based structure defining widgets for user inputs. |
| Main Code | Contains your Python main script. |
4. Save your configuration.
After filling out all fields, click SAVE to store your WIP tool settings.
On the code editor window, switch to the Widget creator code tab and then press the run button. You can now close this window.
5. How to Run the WIP as a user.
Load the OpenEP case in EP Workbench.
Fill in the user-inputs in the WIP Workspace.
Press the Run/Play button.
System Requirements:
-

Platform
Windows 10+ / Mac
ARM-based (M series) / Linux Ubuntu 22+ compatible -

Memory
Minimum 8GB RAM, 20GB storage
Release notes:
-
This beta version of EP Workbench is our first public release of the software for Academic and Research use.
Data import from OpenEP, openCARP, CVI42, and VTK supported.
Interactive visualisation of voltage, LAT, conduction velocity on 3D cardiac models.
ECG signal analysis and annotation tools included.
Remote simulation runs on ARCHER2 (UK National Supercomputing Service).
Support for custom Python code snippets as plug-and-play.
Export functionality to OpenEP, openCARP, and CSV formats.
-
Mesh Editor in Linux: Mesh editor tool in the Linux version has been temporarily disabled due to incompatibility in updates of dependent libraries.
Simulation retrieval: Larger files from remote servers may timeout; manual retrieval recommended as a workaround.
Mapping points: Slow performance observed during deletion or restoration of points due to background visualisation calculations. Disabling auto-interpolation in preferences may improve performance.
Installation guide:
-
EP Workbench supports Apple Silicon (M-Series) Macs running macOS 11.7 or later.
Download the Apple Silicon (.dmg) file from the link above.
Open the .dmg file and follow the on-screen instructions.
Note:
You may need to allow macOS to open EP Workbench:Go to System Settings → Privacy & Security.
Under Security, select "App Store and identified developers".
-
EP Workbench requires Windows 10 or later.
Download the zip file from the download link above
Extract the folder EPWorkbench (v1.0.0-beta.1) to C:\Program Files.
Open the extracted folder, right-click the .exe file, select Create Shortcut, and move the shortcut to your desktop or desired location.
-
EP Workbench can be installed on Linux Ubuntu 22.04 or later.
Download the zip file from the download link above
Extract the folder EPWorkbench (v1.0.0-beta.1).
In the extracted folder, right-click the .opt file and select Properties → Permissions, then enable “Allow executing file as program”.
Double-click the .opt file to launch EP Workbench.
Bug reports
Please report any bugs you notice so that the software can be improved. Raise an issue on Github: https://github.com/openep/EPWorkbench/issues
Feature requests
Please let us know if there are features you want added to EP Workbench: https://github.com/openep/EPWorkbench/discussions